söndag 22 februari 2015

1886 overskirt

I have wanted to make an overskirt for my mid 1880's dress for a while. When the Historical Sew Monthly challenge #2 turned out to be blue, I finally got a long to do it. The problem was that there are so many beautiful over skirts in fashion plates, so first I could not even decide want I wanted. Then I had to drape it. That was not made easier by the fact that I did not want to cut the fabric too much before deciding how to drape it, but it is harder to test drape too large pieces of fabric... Finally thou I found a design I liked. It is an 1886 overskirt, highly asymetrical as was popular then. In the pictures today it does not look quite as I thougth it would, but here it is anyway. It is worn with a skirt, bodice and hat I made earlier, from the Truly Victorian patterns TV261-R, TV460 and TV550, and over the TV101 Petticoat with wire bustle, a chemise, and a corset.

Thanks to Olof for the nice pictures, taken in Gamla Linköping. 


The back turned out a bit odd. I might have to sew down the burnouse pleats a bit to make it look better, now they seem to just stack up in a single heap.


We also took some photos of the Talma Wrap I made a few years ago. It was very nice and warm in the cold weather! It has a fitted back and a loose front. When I made it I did not think I would have much use for it, but with the unreliable summers here (and this winter photo session...) it has been very useful.


So, for the HSM:
Challenge #2: Blue
What the item is: 1886 Asymetrical overskirt
Fabric: A striped wool with nice drape, probably wool-polyester mix.
Pattern: None, draped with inspiration from lots of fashion plates.
Year: 1886
How historically accurate is it? Overall look is reasonably OK, even if it did not turn out quite as I wanted. Minus for syntetic in fabric. I am not sure about wearing an overskirt that is not matched to bodice at all. Maybe 75%?
Hours to complete: Lots and lots of time to try to decide how I wanted it to look, and then figuring out how to drape it. About two hour actually sewing (mostly for hand hemming all edges).
First worn: For photo session today.
Total cost: Fabric from stash. Maybe about 200 SEK, that is about 20 Euro?

torsdag 12 februari 2015

18th century part 2 - the test caraco


After finally finishing the underwear (I don’t like corsets!), it was time to move on to the fun parts. But before cutting the silk I had bought for making a polonaise, I wanted to try the pattern with something less expensive. I had bought the 1770 polonaise and petticoat pattern from Period Impressions, with the intentions of keeping it simple, and follow the pattern and instructions. As usually, I soon failed that intention. I decided to make a caraco like the 1775-85 Caraco in Patterns of Fashion 1 as my test garment, so I modified the pattern to look like that one. 

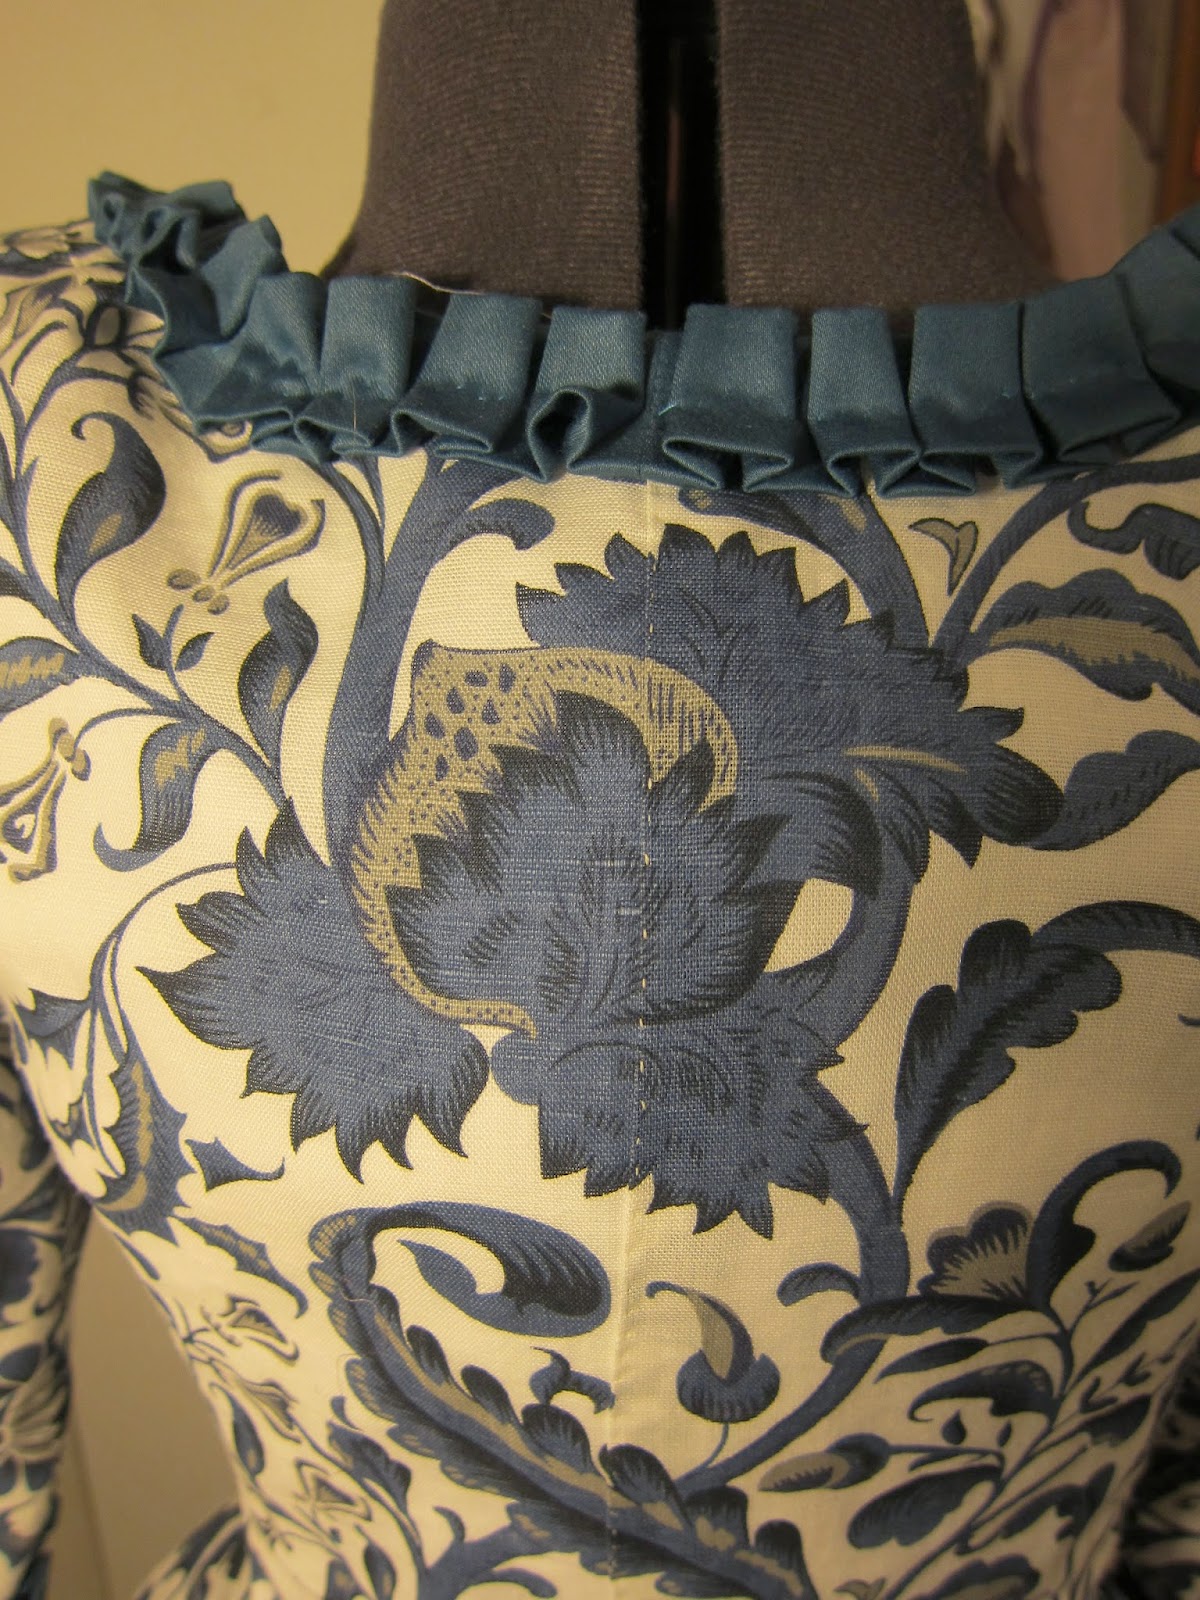
For fabric, I bought long curtains with a large blue floral print at IKEA.  Not totally authentic, but I like it. (And what was left was enough to make nice curtains for our living room of...)

When starting, I found out that I wanted to try some period construction methods. Therefore it is flat lined, with lapped seams, instead of the bag lining method in the pattern. 
Lapped seam at center back


I think it makes sense – with lapped seams on the outside it will be easier to adjust he fit during the construction. I also used a period way of sewing on the sleeves, as described in this tutorial: first sewing the bottom half of the sleeve in the armscye, then putting the dress on a dress form or model and pleating the top part on the shoulder lining to fit the wearer, and then hiding the seam with the shoulder strap pieces. I found it to be easier to manage the sleeves by draping them on my dress form dummy this way than trying to make pleats/gathering stay in shape when setting it in the modern way. I made my caraco sleeves too wide to be historically correct for this period– after a 1570s dress were I could barely get my arms high enough to eat, I wanted to be able to move comfortably in this one. 
Sleeve with pleating hidden under shoulder strap, and close-up of pleated trim


The petticoat is made from a cotton sateen I found in my stash. The different color of the flounce is due to lack of fabric, but I think it turned out quite nice, in a silly-18th-century way. The puffs are inspired by pictures like these, and stuffed with poly fill.
Elisabeth Vigée Le Brun, “Marie-Antoinette se promenant dans un jardin vers 1780-1785.” Wikimedia Commons.

1784 fashion plate from Gallerie des Modes: “L’aimable Constance tenant en lesse un Chien-Lion et rêvant à celui que son coeur aime: sa robe est à la Turque et son chapeau à la Mongolfier, pose sure une baigneuse, et ceint d’un ruban attaché d’une boucle à l’Angloise avec un panache.” Museum of Fine Arts, Boston. 

The trimming on the caraco is the petticoat flounce fabric, and strained my patience a bit as I had to glue the edges of the fabric with fray-check before pleating it. As my fray-check bottle was a bit un-cooperative, I had to use a small brush to apply it. The caraco is closed by being needled together at the front. I like when there are period excuses not to put in all those hooks and eyes for closure!
Caraco and petticoat
When I put it on first time I also realized an additional important point of the corset, except for flat front and squishing you around a bit: it prevents all those bands at waist from strangling you! In my dress, there are four bands at waist: bum pad, back half of under petticoat, back half of petticoat, and the tape that are attached to the caraco back, to make it fit better at back. Plus the fronts of the two petticoats. And I guess the pockets should be attached to a waist band, not pinned on, so there would be another one. Definitly not something I would want without the corset to distribute pressure... 


tisdag 10 februari 2015

18th century part 1 - underwear


About two years ago, a friend talked me into doing 18th century with her. At first, I was not too thrilled of the idea. To me, 18th century was pastel colors and hair in piles of curls, neither being a favorite of mine. But as I had no other projects going at the moment, and since it seemed very fun to have a project together, I let myself be convinced. When I started looking into the period, it turned out to be not as bad as my initial feelings. Not bad at all! In fact, I soon wanted to make several different dresses. 

But first, there was the underwear. Apparently I was not standard sized compared to the corset pattern, so I had to do a lot of adjusting to make it fit reasonably. It is boned with spring steel, and perhaps more heavy than I need. It is a bit ugly, and I could not convince myself to do the lining, but it will probably be used something like once a year, so I guess it will hold. I also made a very simple shift, entirely machine sewn from an old bed sheet. As I meant the costume to be later part of 18th century I also made a bum pad, after reading the excellent test of different variations of bum pads on demodecouture.


  I also made a “quilted” under petticoat. The petticoat is made of a white bed spread I got for free several years ago and kept just in case I would ever get into 18th century and need an ugly quilted petticoat… It is not good to actually get use of these type of old hoardings- how can I ever stop buying nice-to-have fabrics if they prove to be useful from time to time? The fabric is very synthetic and not even quilted properly, rather the layers seems to have been glued or melted together. It gives lots of volume to the skirt thou. I guess it is a close relative to American Duchess' “ugly puffer” … This petticoat is not based on anything period, but I am mostly concerned with getting the proper siloutte for the outer wear, and this really gives volume. 


The pockets are made from an embroidered table cloth I got, that I pieced together and added a bit more embroidery to. The pattens is not perfect, but it is period to use non-matching strips of printed fabric to bind them, according to , so I used scraps from the caraco (which will be presented in next post).
Then, it finally was time to move on to the parts meant to be seen.

måndag 2 februari 2015

HSM #1: Foundations

The Challenge: #1 Foundations
Fabric: Medium weight cotton canvas
Pattern: Truly Victorian 1903 Edwardian Corset
Year: 1903
Notions: Polyester thread, grommets, cotton bias binding, steel busk, steel and plastic boning from stash
How historically accurate is it? As far as I know, the pattern and shape is very period. It is also very period to use the extra padding in the top that I needed to put in... I'm only interested in getting the right shape for the outer garments, so I just followed instructions in the pattern, and used what I had at home.
Hours to complete: 10-20?
First worn: Not yet, as I need outer garments first...
Total cost: around 30 $
And the staring-face picture:


In its finished state, the fit of the corset seems good enough. There was some some confusion along the way thou. The pattern stated that this kind of corset could not, and should not, be fitted with a mock-up, as the point of the corset is to shape the body and change the posture, and all the boning is needed for that. So I promptly ignored that advice, made a mock-up, put a fake busk (a wooden ruler...) in front, and saw that the fit was really weird. The hip and waist was good, but it was way too big over the bust. I re-took the measurments, and they were correct. Mysterious.


I then realized that I should probably do as the pattern said, threw away the mock-up, and made up the corset properly. It was still just as big. Is was very common back then to use padding in the top, to get the large pidgeon-bust, but this seemed a bit excessive. Fortunately, it was possible to make a dart in the bust cups, to make it a bit closer to me. I still use padding both over the hips and at the bust, to create more curves without having to sqeeze the waist. I'm not fond of corsets, so this actually has my natural waist size. This one is meant more to hold the padding than to move things around.

I also made a quite ugly corset cover. It is just meant to be something to put enough ruffles on so that the top of the corset does not show through the blouse, and to add a bit more to the pidgeon breast look. It is historically correct to have ruffles, but otherwise I just made it up as simple as possible. That is probably not historically accurate - this period seems fond of pretty elaborate lace creations for underwear.


 Perhaps it is obvoius that I am not that fond of making the foundation wear? Maybe I should learn to stick to one time period, so I don't have start all over with corset and underskirts...


Plans for Historical Sew Montly 2015

I plan to participate in the Historical Sew Monthly 2015 challenge. I have been wanting to do it last years, and now that it is monthly I will give it a try.

My plan for the first half of challenges is (but will most likely change along the way):

January – Foundationsmake something that is the foundation of a period outfit.
As I had just started with making an 1905 costume, this suited very well: I made a corset and corset cover.

February – Colour Challenge Blue: Make an item that features blue, in any shade from azure to zaffre.
This will be an overskirt for my 1886 dress, in a very dark blue pinstripe wool that I have been hoarding a while for something like that.

 March – Stashbusting: Make something using only fabric, patterns, trims & notions that you already have in stash.
Probably the petticoat for the 1905 skirt, from an old bed sheet with lace in.

April – War & Peace: the extremes of conflict and long periods of peacetime both influence what people wear.  Make something that shows the effects of war, or of extended peace.
I made a female version of a uniform from 1886, (not entirely historical...) but I would like some more details on it so this might be an opportunity to get that done.

May – Practicality:  Fancy party frocks are all very well, but everyone, even princesses, sometimes needs a practical garment that you can DO things in.  Create the jeans-and-T-Shirt-get-the-house-clean-and-garden-sorted outfit of your chosen period.
 The blouse for the 1905 costume, as it will be based on what a woman working in an  office could have worn.

June – Out of Your Comfort Zone: Create a garment from a time period you haven’t done before, or that uses a new skill or technique that you’ve never tried before. 
Maybe fixing the odd wrinkling on my 1770 dress - I have made it last year but am still a bit scared of the silk it's made from, so it's definitly not in my comfort zone.

 July – Accessorize: The final touch of the right accessory creates the perfect period look.  Bring an outfit together by creating an accessory to go with your historical wardrobe.
1770 hat? Fichu?

Starting up

For some reason, I got into my head that it would be fun to have my own historical costuming blog. A large part of it is that I want to keep track of what I make, for myself. I also thougth it would be fun to write something else than technical reports and reaserch papers. That means that this might be some odd mix of pictures of my historical costumes and musings on random topics.

So as a start, some thougths about hobby and work. Yesterday I started to think about this hobby relates to my work. As I work as research engineer in electrical engineering, the obvious answer was that they has absolutely nothing in common. Costuming is just a nice way to think about something entirely different, or possibly even make my hands so busy that I can stop thinking for a while. But then it occured to me that one part I really like with making historical clothing is the research part in the start of a new project. Yes, research. Which is exactly one of the things I love with my job - the thrill when you start with a idea and get to start finding information, find out how things work, and how things relates to your previous knowledge. Exactly the same as when I start a new sewing for a new time period. Suddenly work and hobby did not seem that different any more! And being very fond of maths certainly helps in resizing patterns and constructing own patterns :-)