Visar inlägg med etikett 18th Century. Visa alla inlägg

torsdag 12 november 2015

Big 1770's hair at the ball

Last Saturday I attended "Ball of all times" here in Linköping. We started the day with dancing training, with dances from 12th to 19th century. Then we got a few hours to change, and then it was time for eating lots of great historcial food and dancing. I did not take many pictures exept for those I did to document my Big Hair, so this post will be as self-centered as usual even while there was alot of very nice people and a lot of good looking clothing.

I had decided to use my 1770's silk Anglais a la polonaise, as I had only used it once, and I was not that up to making a new ball gown. (As I was all absorbed in making my 4th 1880's day dress. Maybe I should start to have a bit more variation in my projects? No! ) To get something new, I decided to try making a large hairdo. As I have lots of hair, I used no wig, but a lot of padding.

For padding, I bought a "hair donut", meant to be used for making neat hair buns. I got the XXL one, and simply pinned it on top of my head. As it is made of some net-like material, it was very easy to pin in it.  Then I used some of my hair balls as padding at the base of the donut. Then, I spent about one hour and three packets of hairpins on pinning strands of my hair on top of the donut.
Using all this...

... to make this!

I used hair wax instead of 18th century pomade. Then I used maize starch to powder my hair. It worked quite well to make the hair a bit lighter (greyer, in my case. ) In the back, twisted some of the strands before pinning them, to make it a bit more intresting. I had given up on those elegant rolls of hair beforehand, and chosen to make a quite simple hairdo. I had intended to curl the loose lock of hair, but run out of time and decided to leave it.


For once in historical costuming, the blue ends of my hair is not totally anachronistic (just a little bit, being way to bright) as the hair sometimes was powered in colors like blue or pink during this period. Historical or not, I like how the blue strands look. Surprisingly, this hairdo was also very comfortable. As the padding was very lightweight and I only used my own hair, it did not weight more than any modern hairdo. Also, having all the hair on top of my head instead of in for example a bun at the neck meant that the weight did not strain my neck at all.
The dress is still wrinkled at front, but I don't mind as much now that I have a better hairdo to pair it with.


And in soft light you can almost not see the wrinkles!


With some beautiful 18th century ladies :-)
 

söndag 27 september 2015

18th century dress in paper

Last weekend, I got one of those crazy ideas that seems impossible to get rid of. It started when I learned that our grocery store had a competition were first prize was food for ten years (in the form of gift vouchers at their store.). The task in the competition was to photograph yourself with a bag from their store and upload it. Me and Olof started to jokingly discuss if it could be possible to win without having cute children or cats to put in the picture. I suddenly got the idea to make myself a 18th century dress from their paper bags and use for the photo. I managed to resist for a day, but on Monday evening, I could not resist any more (the fact that I had planned to do some workout to strengthen my back that evening and to do some other boring stuff had nothing to do with it, I promise!).

Once decided, I went and bought seven paper bags and started working. I used the same pattern as my previous 18th century dress, so I knew the fit was good. The stiff and conical silhouette of 1760-1770's lended itself quite well to the stiff paper, but I had to give up on the sleeves, they just tore off all the time. At least, it was not a problem to get enough width over the hips - no need for bumroll or multiple petticoats here! The bodice and side seams of the skirt are taped with duct tape, and the skirt are then pleated to a waist band and just pinned in place. After all, it only had to look good enough at one picture, so no need to overdo it.

I got quite fond of the row of bows, I might have to make a proper dress like that some day (yet another thing for the too long wish-list...)
For the competition, I chose the angle "getting time and money left for my hobby", so I dressed up in my paper dress and made a vaguely 18th century looking hairstyle. Then Olof photographed me pretending to work on an already finished 18th century dress. We had to get lamps from all over the apartment to get good enough light. It was all very fun!
I always dress up when finishing my dresses (or not!).
 
The hairdo only looked decent from the front so we tried to have me look straight into the camera at most photos. I will have to figure out to make a proper hairdo before the ball were I intend to wear one of my 18th century ones.

The facts: 
What is it: a 1770's inspired dress in paper for a competition


Material: paper bags from grocery store, duct tape, pins

How historically correct is it? Well, not very... The general shape of the bodice and skirt is ok, but obviously not construction, sleeve-less-ness, material or total look.

Cost? About 20 kr, 3 $, for the bags

Time to make: 1.5 h.

First worn: first and only time, for the photoshot.

torsdag 19 mars 2015

A fichu for the18th century dresses

The Historical Sew Monthly challenge have so far been a big motivator. Among other things, it made me decide that it would be a good idea to make the accesoares to my costumes. For example, I have two 18th century dresses, but no shawls, outerwear or headwear, which makes it a bit hard to use them, at least outside. I started this intention simple with a fichu as an entry for the stashbusting challenge.In the first picture, it is shown with the pattern test caraco I made last year.

The fichu worn with my blue caraco.

A close up, showing the piecing


The facts:
What the item is: an 18th century fichu

The Challenge: #3 Stashbusting

Fabric: It is made from a thin cotton with broderie anglaise (I think it is, anyway) and another piece of fabric that matched the embriodered one in very well. As there was stains on the embroidered fabric, I had to do some piecing even when it is such a small garment.

Stashed for?: Both fabrics were gifts. Actually, the emboiderad one I got at the same time as the fabric for the 1903 petticoat.

Pattern: none, just looking at some pinterest pictures.

Year: I guess it could work for second half of 18th century and maybe a bit later as well? I have not researched this apart from looking at some pictures so I don't know.

Notions: thread.

How historically accurate is it? I am not sure. It is hand sewn, with seams types that were used. Cotton could be used, as well as embroidery (but not machine sewn). I am just not sure if these thing could have been combined the way, and if it matches my caraco.

Hours to complete: 2-3 h: lots of hand sewing due to the piecing. And roll hemming is slow...

First worn: by my mother at a historical "fika" in Gamla Linköping last Sunday, with her regency dress.

Total cost: 0, as fabric was a gift.

torsdag 12 februari 2015

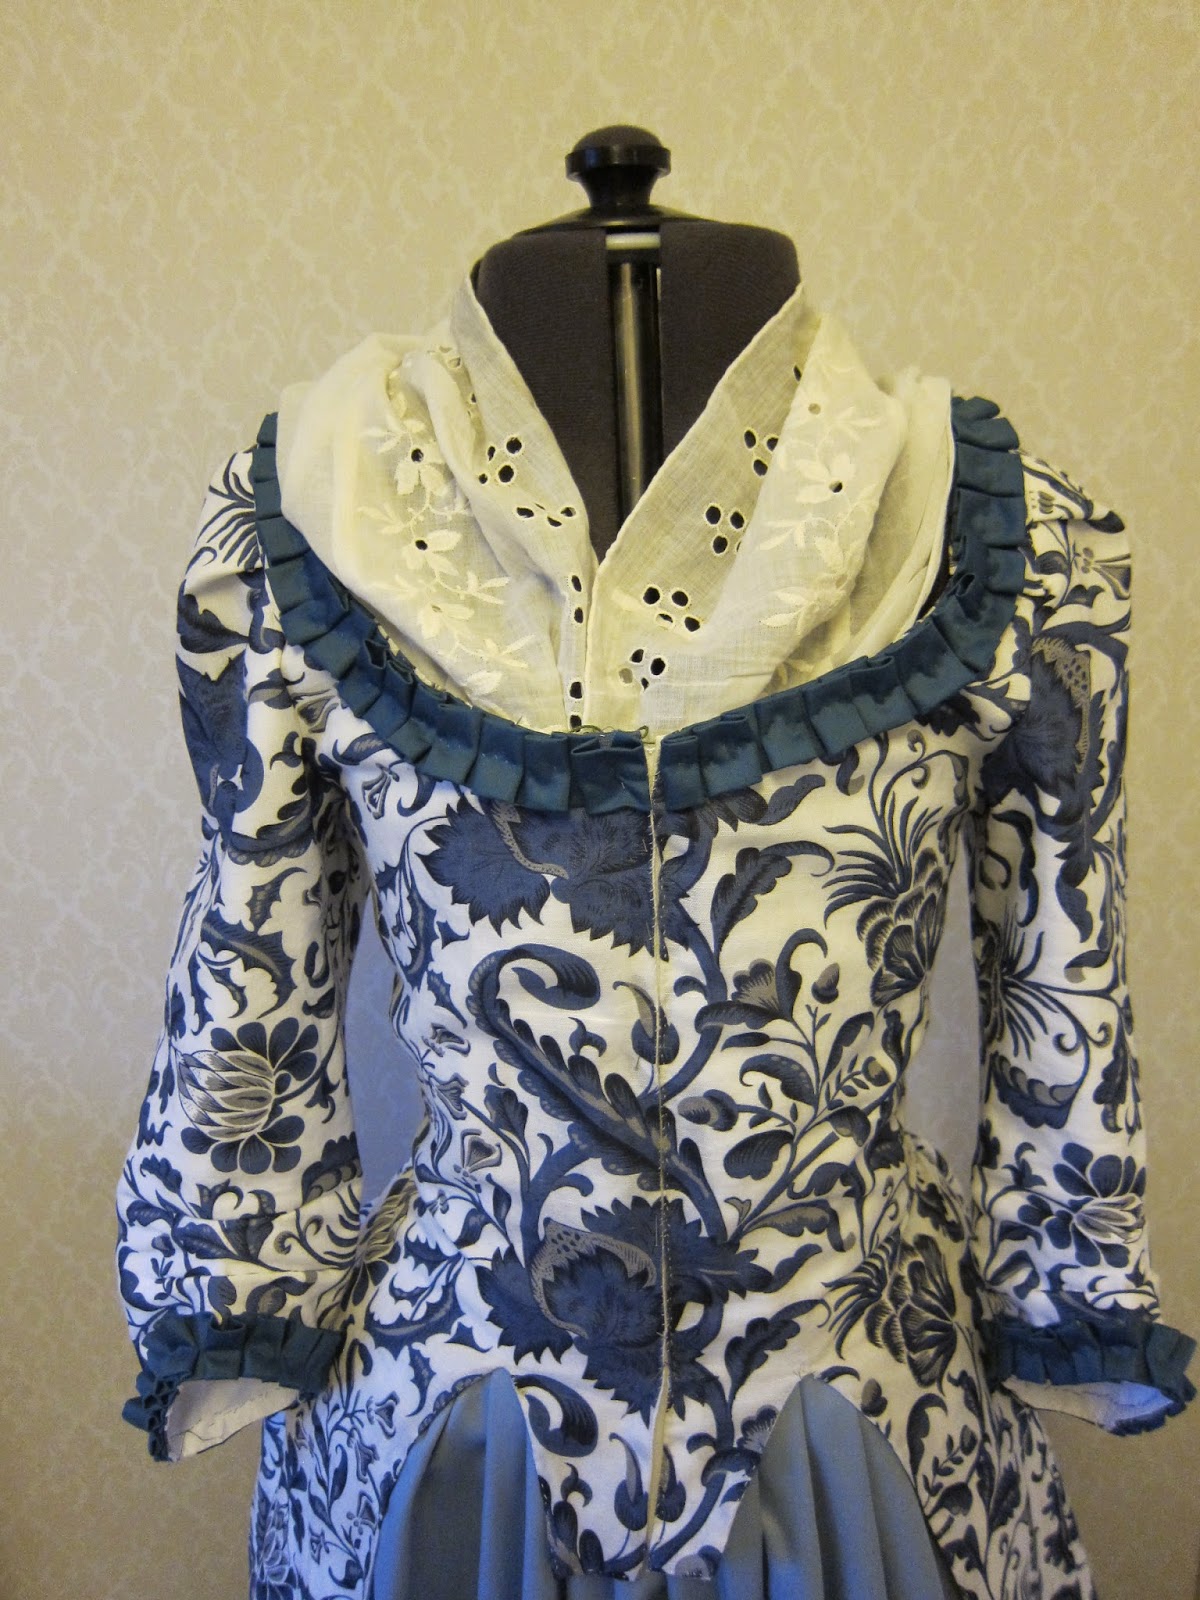
18th century part 2 - the test caraco


After finally finishing the underwear (I don’t like corsets!), it was time to move on to the fun parts. But before cutting the silk I had bought for making a polonaise, I wanted to try the pattern with something less expensive. I had bought the 1770 polonaise and petticoat pattern from Period Impressions, with the intentions of keeping it simple, and follow the pattern and instructions. As usually, I soon failed that intention. I decided to make a caraco like the 1775-85 Caraco in Patterns of Fashion 1 as my test garment, so I modified the pattern to look like that one. 

For fabric, I bought long curtains with a large blue floral print at IKEA.  Not totally authentic, but I like it. (And what was left was enough to make nice curtains for our living room of...)

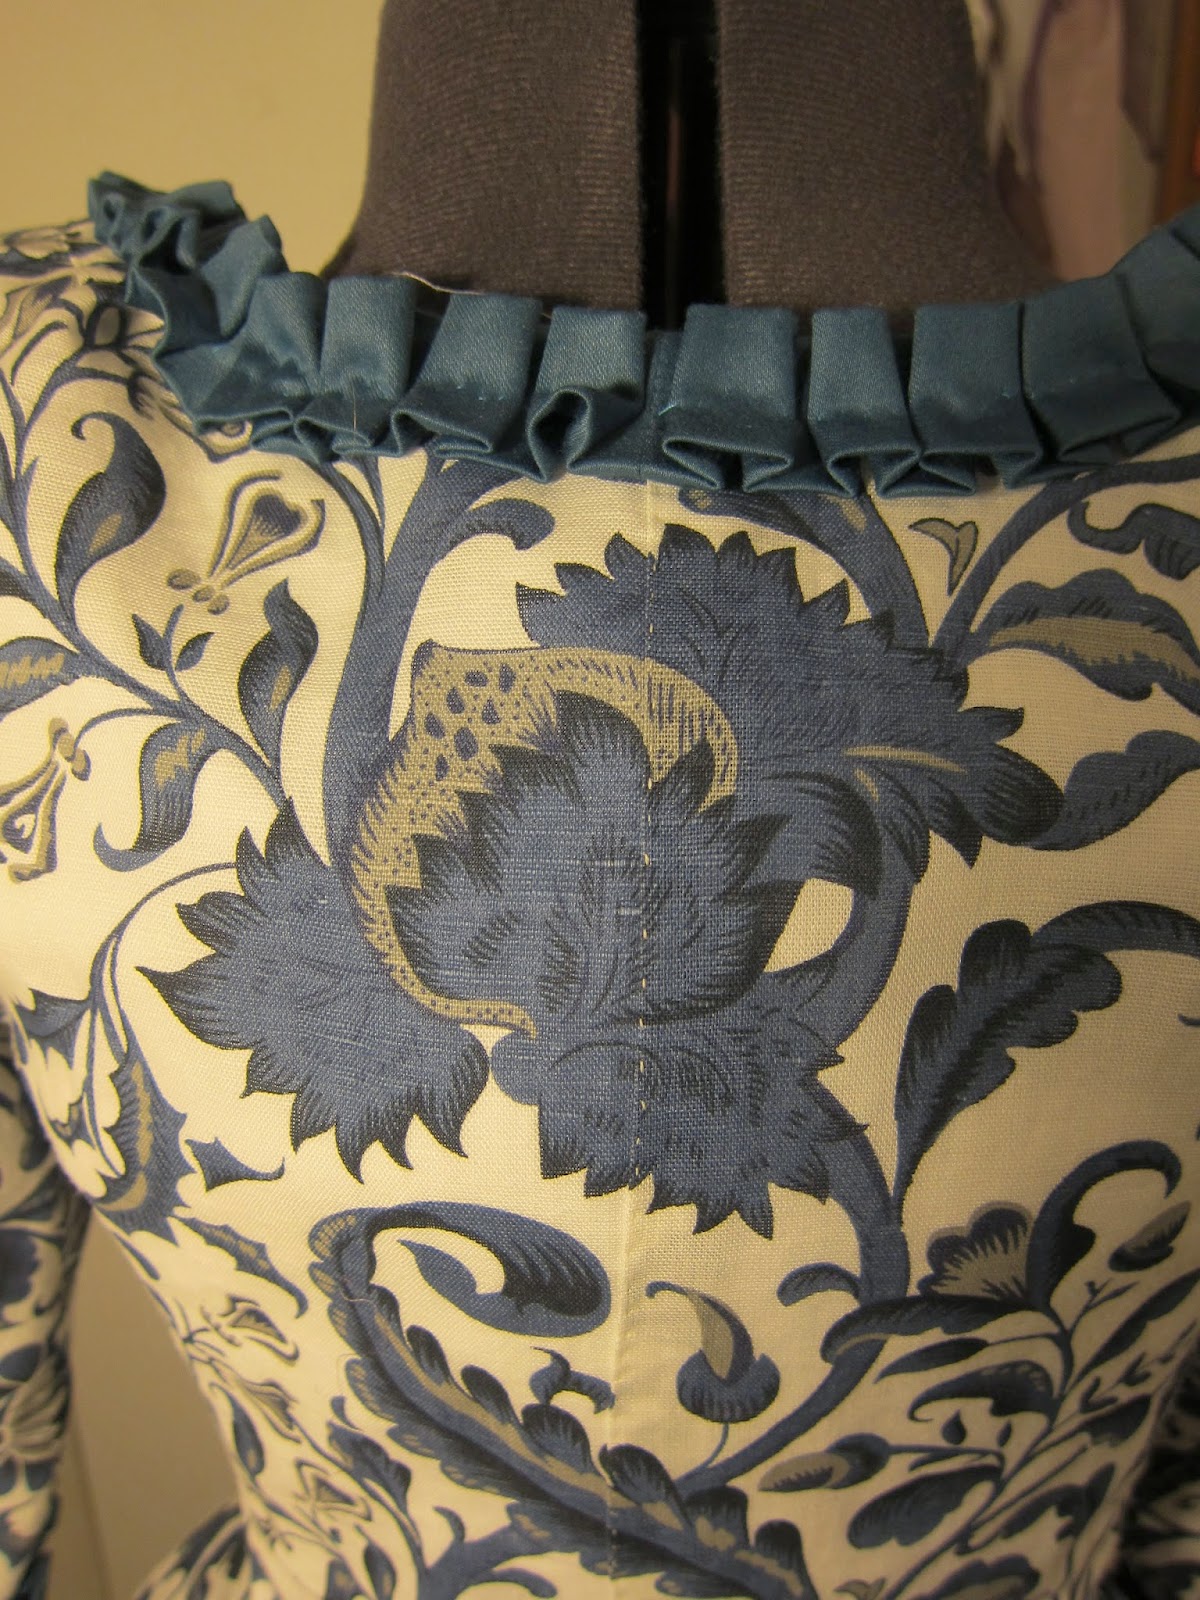
When starting, I found out that I wanted to try some period construction methods. Therefore it is flat lined, with lapped seams, instead of the bag lining method in the pattern. 
Lapped seam at center back


I think it makes sense – with lapped seams on the outside it will be easier to adjust he fit during the construction. I also used a period way of sewing on the sleeves, as described in this tutorial: first sewing the bottom half of the sleeve in the armscye, then putting the dress on a dress form or model and pleating the top part on the shoulder lining to fit the wearer, and then hiding the seam with the shoulder strap pieces. I found it to be easier to manage the sleeves by draping them on my dress form dummy this way than trying to make pleats/gathering stay in shape when setting it in the modern way. I made my caraco sleeves too wide to be historically correct for this period– after a 1570s dress were I could barely get my arms high enough to eat, I wanted to be able to move comfortably in this one. 
Sleeve with pleating hidden under shoulder strap, and close-up of pleated trim


The petticoat is made from a cotton sateen I found in my stash. The different color of the flounce is due to lack of fabric, but I think it turned out quite nice, in a silly-18th-century way. The puffs are inspired by pictures like these, and stuffed with poly fill.
Elisabeth Vigée Le Brun, “Marie-Antoinette se promenant dans un jardin vers 1780-1785.” Wikimedia Commons.

1784 fashion plate from Gallerie des Modes: “L’aimable Constance tenant en lesse un Chien-Lion et rêvant à celui que son coeur aime: sa robe est à la Turque et son chapeau à la Mongolfier, pose sure une baigneuse, et ceint d’un ruban attaché d’une boucle à l’Angloise avec un panache.” Museum of Fine Arts, Boston. 

The trimming on the caraco is the petticoat flounce fabric, and strained my patience a bit as I had to glue the edges of the fabric with fray-check before pleating it. As my fray-check bottle was a bit un-cooperative, I had to use a small brush to apply it. The caraco is closed by being needled together at the front. I like when there are period excuses not to put in all those hooks and eyes for closure!
Caraco and petticoat
When I put it on first time I also realized an additional important point of the corset, except for flat front and squishing you around a bit: it prevents all those bands at waist from strangling you! In my dress, there are four bands at waist: bum pad, back half of under petticoat, back half of petticoat, and the tape that are attached to the caraco back, to make it fit better at back. Plus the fronts of the two petticoats. And I guess the pockets should be attached to a waist band, not pinned on, so there would be another one. Definitly not something I would want without the corset to distribute pressure... 


tisdag 10 februari 2015

18th century part 1 - underwear


About two years ago, a friend talked me into doing 18th century with her. At first, I was not too thrilled of the idea. To me, 18th century was pastel colors and hair in piles of curls, neither being a favorite of mine. But as I had no other projects going at the moment, and since it seemed very fun to have a project together, I let myself be convinced. When I started looking into the period, it turned out to be not as bad as my initial feelings. Not bad at all! In fact, I soon wanted to make several different dresses. 

But first, there was the underwear. Apparently I was not standard sized compared to the corset pattern, so I had to do a lot of adjusting to make it fit reasonably. It is boned with spring steel, and perhaps more heavy than I need. It is a bit ugly, and I could not convince myself to do the lining, but it will probably be used something like once a year, so I guess it will hold. I also made a very simple shift, entirely machine sewn from an old bed sheet. As I meant the costume to be later part of 18th century I also made a bum pad, after reading the excellent test of different variations of bum pads on demodecouture.


  I also made a “quilted” under petticoat. The petticoat is made of a white bed spread I got for free several years ago and kept just in case I would ever get into 18th century and need an ugly quilted petticoat… It is not good to actually get use of these type of old hoardings- how can I ever stop buying nice-to-have fabrics if they prove to be useful from time to time? The fabric is very synthetic and not even quilted properly, rather the layers seems to have been glued or melted together. It gives lots of volume to the skirt thou. I guess it is a close relative to American Duchess' “ugly puffer” … This petticoat is not based on anything period, but I am mostly concerned with getting the proper siloutte for the outer wear, and this really gives volume. 


The pockets are made from an embroidered table cloth I got, that I pieced together and added a bit more embroidery to. The pattens is not perfect, but it is period to use non-matching strips of printed fabric to bind them, according to , so I used scraps from the caraco (which will be presented in next post).
Then, it finally was time to move on to the parts meant to be seen.