I have finally summoned energy and inspiration at the same time, and managed to finish the first piece of my work-in-progress steampunk forest dress (which is also my first finished costuming piece this year). It is a crinoline, based on an 1850s/1860s cage crinoline. It is meant to be partly seen under the skirt of the dress it will be worn with. My idea was to have a marked contrast between a green and organic feeling of the dress, and a crinoline with a distinctly mechanical, metallic and man-made feeling. This is what I ended up with. It is decorated at the part where the skirt will be raised to show the crinoline.
 |
| The crinoline, here worn without any skirt. |
I made the decoration pieces from craft foam, first glued together, then with some layers of wood glue (to seal the pores of the foam), and then finally several layers of paint. I also added some metal parts from my box of might-be-useful-some-day pearls, old electronics, and wires. For an impatient person like me, that was a lot of waiting for things to dry (also, glue is
smelly)... When sewing, of course it can take some hours to pleat and sew on a piece of decoration, but then at least I am doing something. Except for the waiting time however, it was very fun to work with foam! It is so easy to cut out, does not fray like fabric or warp in water like cardboard, and you can build three dimensional pieces by stacking flat pieces or gluing them together.
 |
| The decoration pieces, mostly made from craft foam |
 |
| Of course I could not resist some gears on a steampunk garment - they are really tiny thou! And something mechanical from a watch. |
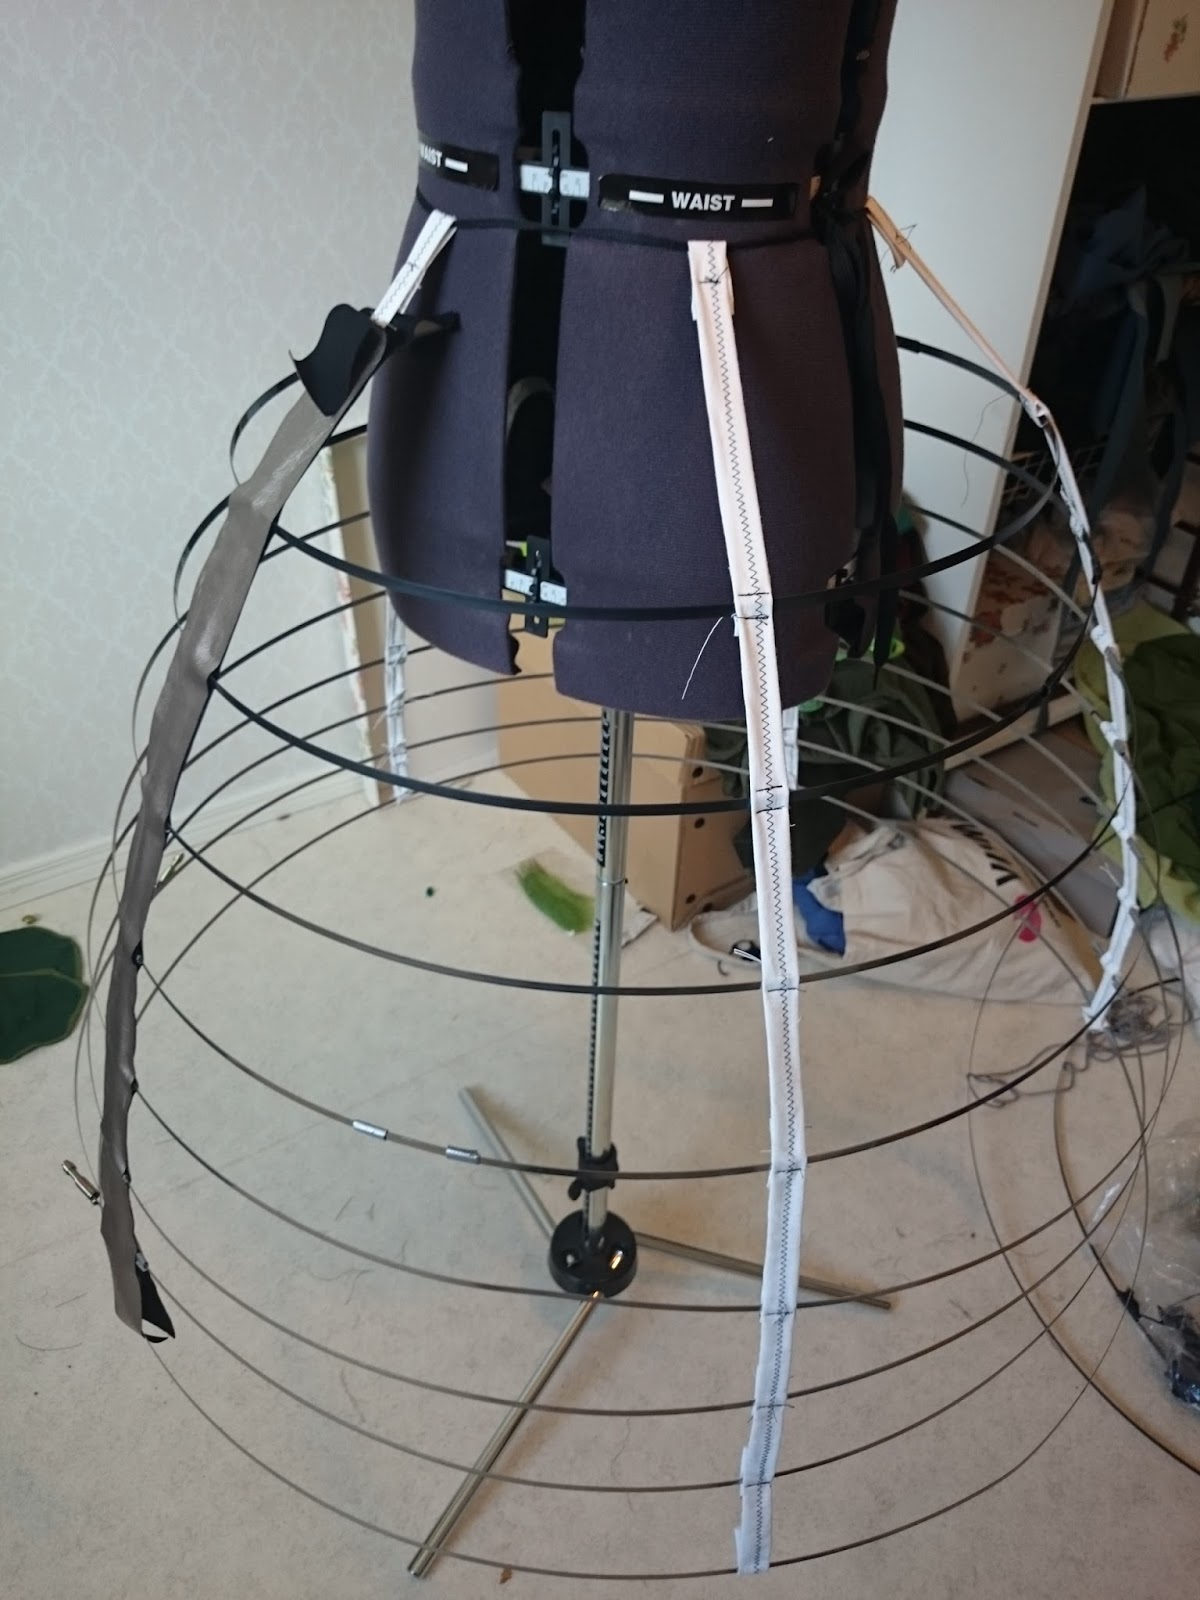
The construction of the crinoline took some considering. Drafting it was quite easy, as I based the measurements on my 1860s hoop, but made it shorter and slightly wider at the top, to get a more pronounced skirt shape. Figuring out how to make it hold together was harder. Most crinolines I see made today either have the steel hoops coated in fabric and then sewed to the vertical bands, or is made of fabric with the steel hoops sewn in. I wanted the steel hoops to be seen, so covering them in fabric was not an option. I was not able to find a description of how to make it like I wanted, so I had to make something up myself. Making them stay in place vertically is easy, just make loops in the vertical bands and run the steel rings through, but how to prevent the vertical bands from sliding around the steel rings and the distorting the shape? I didn't trust glue to hold, so I ended up making using tape, see picture. Then I covered the bands with steel coloured fake leather, to get as much metallic look as possible while keeping it possible to flatten and store it.
 |
| Here, only one of the vertical bands are covered in silver false leather, and the hoops are not yet taped. |
 |
| Here, the tape I used to prevent the steel hoops from sliding is visible, before they become covered by the silver false leather. |
Next picture is a preview of what it might look like with the dress on.
 |
| Preview of how the crinoline will be worn with dress (which is not at all finished yet) |
The dress is not nearly finished, but I show it to give some idea of the context where this crinoline will be worn. Now, I need just finish the dress, and the shoulder piece, and the attachable sleeves, and the hat, and some kind of harness for some leather bags I have to make or find, and preferably some matching jewellery. Suddenly, it does not feel so long to the beginning of September (when I hope to first wear this dress) anymore...